占位式插件化之加载Service和动态广播
接着上一篇加载Activity来,启动Service和启动Activity的套路是一样的,宿主端定义一个代理的Service,标准的module中定义一个Service的标准接口,然后开始干。
先来到标准module中添加一个Service的标准接口1
2
3
4
5
6
7
8
9
10
11
12
13
14
15public interface ServiceInterface {
/**
* 把宿主(app)的环境传给插件
* @param appService
*/
void insertAppContext(Service appService);
public void onCreate();
public int onStartCommand(Intent intent, int flags, int startId);
public void onDestroy();
}
跟Activity一样,这里可以吧Service的所有生命周期方法都加进来,这里就加入几个主要的方法。
然后来到插件包中,创建一个BaseService来接收宿主传过来的上下文环境1
2
3
4
5
6
7
8
9
10
11
12
13
14
15
16
17
18
19
20
21
22
23
24
25
26
27
28
29
30
31
32
33
34public class BaseService extends Service implements ServiceInterface {
public Service appService;
/**
* 把宿主(app)的环境传给插件
* @param appService
*/
public void insertAppContext(Service appService){
this.appService = appService;
}
@Nullable
@Override
public IBinder onBind(Intent intent) {
return null;
}
@Override
public void onCreate() {
}
@SuppressLint("WrongConstant")
@Override
public int onStartCommand(Intent intent, int flags, int startId) {
return 0;
}
@Override
public void onDestroy() {
}
}
BaseService实现了ServiceInterface接口,并实现接口中的方法来公子类调用
然后创建一个测试的Service PluginService1
2
3
4
5
6
7
8
9
10
11
12
13
14
15
16
17
18
19
20
21
22
23
24
25
26
27
28
29
30
31
32public class PluginService extends BaseService {
private static String TAG = PluginService.class.getName();
@Override
public void onCreate() {
super.onCreate();
}
@Override
public int onStartCommand(Intent intent, int flags, int startId) {
new Thread(){
@Override
public void run() {
super.run();
while (true){
try {
Thread.sleep(300);
} catch (InterruptedException e) {
e.printStackTrace();
}finally {
Log.i(TAG,"插件中的服务在运行......");
}
}
}
}.start();
return super.onStartCommand(intent, flags, startId);
}
@Override
public void onDestroy() {
super.onDestroy();
}
}
在PluginService中开启一个线程打印日志用来开启服务之后测试使用
PluginActivity中设置点击开启服务的按钮1
2
3
4
5
6findViewById(R.id.btn_service).setOnClickListener(new View.OnClickListener() {
@Override
public void onClick(View v) {
startService(new Intent(appActivity,PluginService.class));
}
});
这里使用了startService方法,根据前面的套路,这个方法也需要安装的上下文环境,所以我们还是得在BaseActivity中重写此方法来转换为宿主传过来的环境。调用宿主中的startService方法,并把当前PluginService的全类名传过去。1
2
3
4
5
6
7@Override
public ComponentName startService(Intent service) {
Intent intentNew = new Intent();
// PluginService 全类名
intentNew.putExtra("className", service.getComponent().getClassName());
return appActivity.startService(intentNew);
}
OK,插件包中的调用已经完成,下面就来到了宿主中的代理Service中了1
2
3
4
5
6
7
8
9
10
11
12
13
14
15
16
17
18
19
20
21
22
23
24
25
26
27
28
29
30
31
32
33
34
35
36
37
38
39
40
41public class ProxyService extends Service {
@Nullable
@Override
public IBinder onBind(Intent intent) {
return null;
}
@Override
public void onCreate() {
super.onCreate();
}
@Override
public int onStartCommand(Intent intent, int flags, int startId) {
//PluginService的全类名
String className = intent.getStringExtra("className");
try {
Class mTestServiceClass = PluginManager.getInstance(this).getClassLoader().loadClass(className);
Object mTestService = mTestServiceClass.newInstance();
ServiceInterface serviceInterface = (ServiceInterface) mTestService;
// 注入 组件环境
serviceInterface.insertAppContext(this);
serviceInterface.onStartCommand(intent, flags, startId);
} catch (Exception e) {
e.printStackTrace();
}
return super.onStartCommand(intent, flags, startId);
}
@Override
public void onDestroy() {
super.onDestroy();
}
}
ProxyService是一个真实的服务,需要在manifest中注册。
套路跟Activity中一样,先通过intent拿到需要启动的Service的全类名,然后通过类加载工具加载需要启动的服务,强转成对应的标准接口,最后调用接口中的方法来完成。
跟上一篇中的插件内跳转Activity一样,我们需要告诉系统我们需要跳转到哪个Serice,所以重写startService方法1
2
3
4
5
6
7@Override
public ComponentName startService(Intent service) {
String className = service.getStringExtra("className");
Intent proxyIntent = new Intent(this,ProxyService.class);
proxyIntent.putExtra("className",className);
return super.startService(proxyIntent);
}
告诉系统我们要跳转到代理的服务中,通过插件中传过来的intent拿到包名传到代理服务中,这样就完成了。
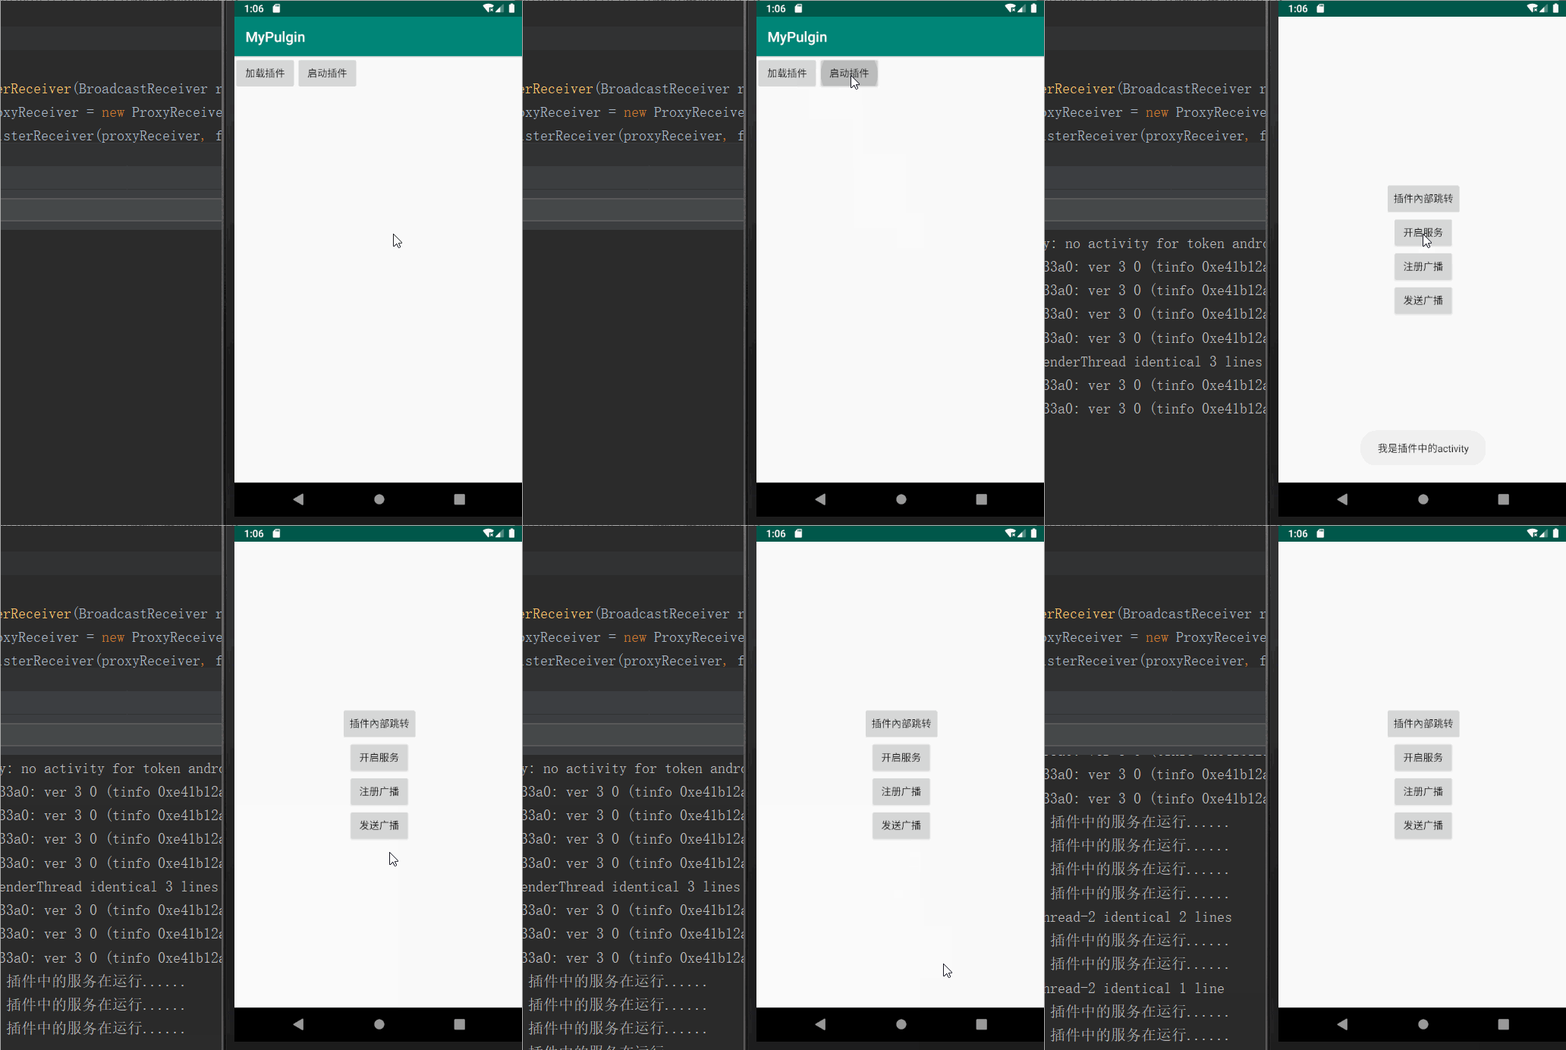
效果:

是不是很简单啊,既然套路都一样,下面把动态广播也一块写了。
先来到标准module中添加广播的标准接口1
2
3
4
5public interface ReceiverInterface {
public void onReceive(Context context, Intent intent);
}
然后来到插件包中,创建一个广播,并实现标准接口1
2
3
4
5
6
7public class PluginReceiver extends BroadcastReceiver implements ReceiverInterface {
@Override
public void onReceive(Context context, Intent intent) {
Toast.makeText(context, "我是插件里面的广播接收者,我收到广播啦", Toast.LENGTH_SHORT).show();
}
}
然后到PluginActivity中添加注册广播和发送广播的按钮1
2
3
4
5
6
7
8
9
10
11
12
13
14
15
16
17
18//注册广播
findViewById(R.id.btn_receive).setOnClickListener(new View.OnClickListener() {
@Override
public void onClick(View v) {
IntentFilter filter = new IntentFilter();
filter.addAction("com.chs.plugin_package.FILTER_ACTION");
registerReceiver(new PluginReceiver(),filter);
}
});
//发送广播
findViewById(R.id.btn_receive_send).setOnClickListener(new View.OnClickListener() {
@Override
public void onClick(View v) {
Intent intent = new Intent();
intent.setAction("com.chs.plugin_package.FILTER_ACTION");
sendBroadcast(intent);
}
});
这里的registerReceiver和sendBroadcast和之前的startActivity和startService一样,都是通过安装环境来调用,所以依然需要在BaseActivity中重写一些转换成宿主的环境1
2
3
4
5
6
7
8
9@Override
public Intent registerReceiver(BroadcastReceiver receiver, IntentFilter filter) {
return appActivity.registerReceiver(receiver, filter);
}
@Override
public void sendBroadcast(Intent intent) {
appActivity.sendBroadcast(intent);
}
最后回到宿主APP中,使用一个代理的广播来接收1
2
3
4
5
6
7
8
9
10
11
12
13
14
15
16
17
18
19
20
21
22
23public class ProxyReceiver extends BroadcastReceiver {
//插件中 PluginReceiver的全类名
private String pluginReceiverName;
public ProxyReceiver(String name) {
pluginReceiverName = name;
}
@Override
public void onReceive(Context context, Intent intent) {
try {
Class<?> pluginServiceClass = PluginManager.getInstance(context).
getClassLoader().loadClass(pluginReceiverName);
Object pluginService = pluginServiceClass.newInstance();
ReceiverInterface receiverInterface = (ReceiverInterface) pluginService;
receiverInterface.onReceive(context,intent);
} catch (Exception e) {
e.printStackTrace();
}
}
}
ProxyReceiver也是一个真实的广播,可以接收到广播。前面Activity和Service都是通过Intent来传递插件中对应类的全类名的,这里不大一样,可以通过构造方法直接传过来。然后就是类加载,强转为对应的标准接口,最后调用接口中的方法啦
我们也需要在ProxyActivity中重写一下注册广播的方法,然后拿到插件中广播类的全类名然后传到代理广播中1
2
3
4
5@Override
public Intent registerReceiver(BroadcastReceiver receiver, IntentFilter filter) {
ProxyReceiver proxyReceiver = new ProxyReceiver(receiver.getClass().getName());
return super.registerReceiver(proxyReceiver, filter);
}
OK广播也完成啦
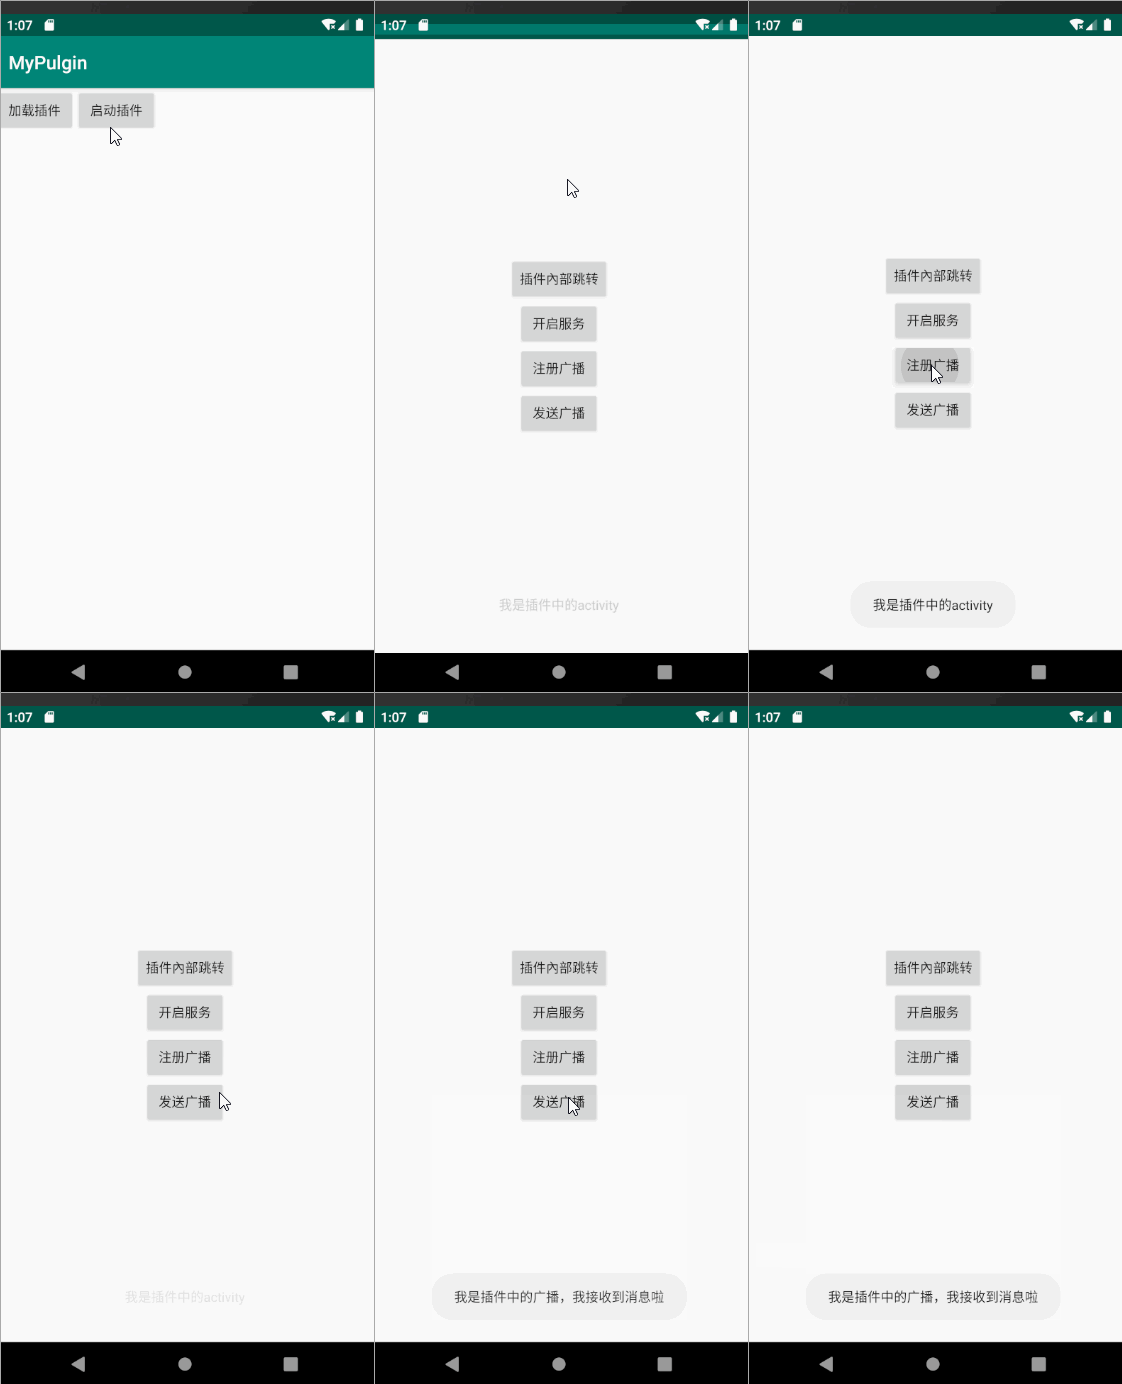
效果:
